Flutter初心者の学習記録 第18回:RowとColumnを使いこなそう
こんにちは、Flutterエンジニアの皆さん!Flutterでアプリ開発を始めると、最初に覚えるべき重要なウィジェットの一つがRowとColumnです。これらはFlutterのレイアウトシステムの基礎となる要素で、画面上にウィジェットを配置するために欠かせません。
今回は、RowとColumnの基本的な使い方から実践的なテクニックまで、初心者にも分かりやすく解説していきます。
RowとColumnとは?
RowとColumnは、FlutterのFlexウィジェットの一種で、子ウィジェットを一列に並べるためのレイアウトウィジェットです。
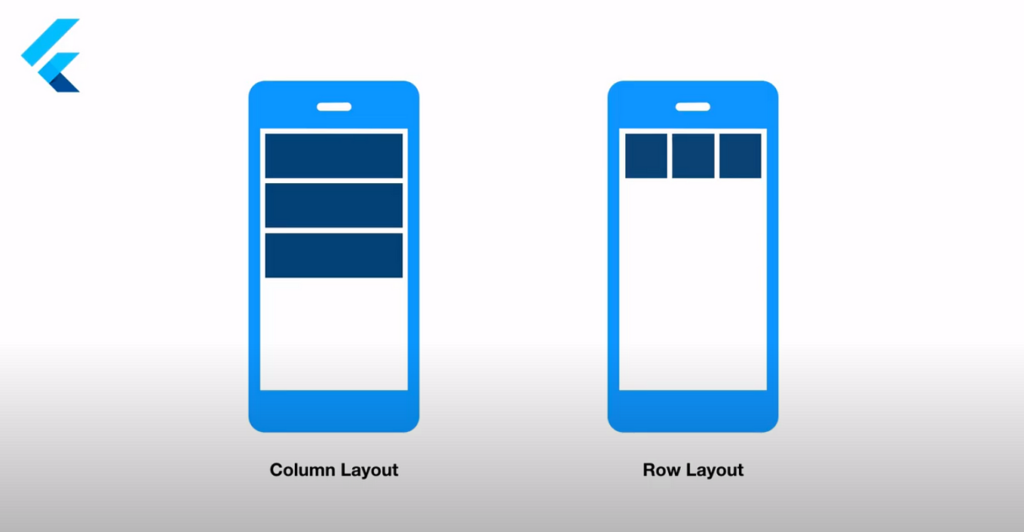
- Row: 子ウィジェットを**横方向(水平)**に並べる
- Column: 子ウィジェットを**縦方向(垂直)**に並べる
Rowの基本的な使い方
Rowを使って、複数のウィジェットを横並びに配置してみましょう。
Row(
  children: [
    Container(
      width: 50,
      height: 50,
      color: Colors.red,
    ),
    Container(
      width: 50,
      height: 50,
      color: Colors.green,
    ),
    Container(
      width: 50,
      height: 50,
      color: Colors.blue,
    ),
  ],
)
この例では、赤、緑、青の3つの正方形が横に並んで表示されます。
Columnの基本的な使い方
Columnを使って、複数のウィジェットを縦並びに配置してみましょう。
Column(
  children: [
    Container(
      width: 50,
      height: 50,
      color: Colors.red,
    ),
    Container(
      width: 50,
      height: 50,
      color: Colors.green,
    ),
    Container(
      width: 50,
      height: 50,
      color: Colors.blue,
    ),
  ],
)
この例では、赤、緑、青の3つの正方形が縦に並んで表示されます。
MainAxisAlignmentとCrossAxisAlignment
RowとColumnの最も重要な概念が、MainAxisAlignmentとCrossAxisAlignmentです。
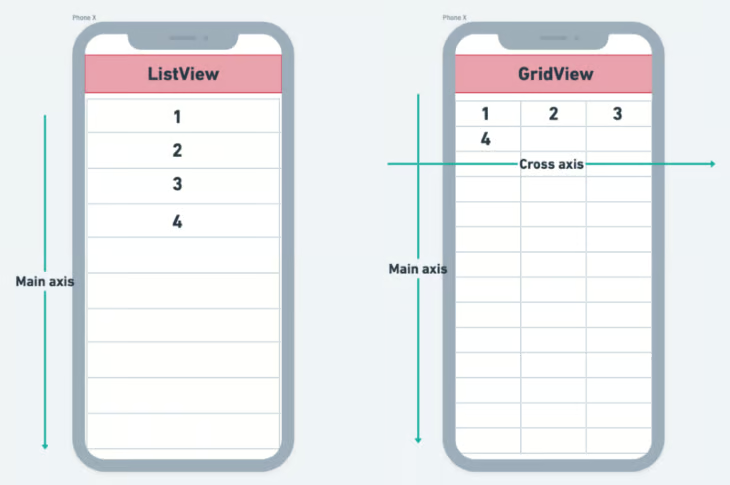
MainAxisAlignment(主軸方向の配置)
- Rowの場合:左右方向(水平方向)
- Columnの場合:上下方向(垂直方向)
主な値:
MainAxisAlignment.start:開始位置に配置(デフォルト)MainAxisAlignment.end:終了位置に配置MainAxisAlignment.center:中央に配置MainAxisAlignment.spaceBetween:最初と最後を端に配置し、間を等間隔にMainAxisAlignment.spaceAround:各要素の周りに等しい間隔を配置MainAxisAlignment.spaceEvenly:全ての間隔を等しく配置
Row(
  mainAxisAlignment: MainAxisAlignment.spaceEvenly,
  children: [
    Icon(Icons.home),
    Icon(Icons.search),
    Icon(Icons.favorite),
  ],
)
CrossAxisAlignment(交差軸方向の配置)
- Rowの場合:上下方向(垂直方向)
- Columnの場合:左右方向(水平方向)
主な値:
CrossAxisAlignment.start:開始位置に配置CrossAxisAlignment.end:終了位置に配置CrossAxisAlignment.center:中央に配置(デフォルト)CrossAxisAlignment.stretch:交差軸方向に伸縮CrossAxisAlignment.baseline:ベースラインに合わせて配置
Column(
  crossAxisAlignment: CrossAxisAlignment.start,
  children: [
    Text('タイトル'),
    Text('サブタイトル'),
    Text('詳細情報'),
  ],
)
実践的な使用例
1. ヘッダー部分のレイアウト
Row(
  mainAxisAlignment: MainAxisAlignment.spaceBetween,
  children: [
    Row(
      children: [
        Icon(Icons.menu),
        SizedBox(width: 10),
        Text(
          'アプリ名',
          style: TextStyle(
            fontSize: 20,
            fontWeight: FontWeight.bold,
          ),
        ),
      ],
    ),
    Icon(Icons.notifications),
  ],
)
2. カード型レイアウト
Container(
  padding: EdgeInsets.all(16),
  decoration: BoxDecoration(
    color: Colors.white,
    borderRadius: BorderRadius.circular(8),
    boxShadow: [
      BoxShadow(
        color: Colors.grey.withOpacity(0.2),
        blurRadius: 4,
        offset: Offset(0, 2),
      ),
    ],
  ),
  child: Column(
    crossAxisAlignment: CrossAxisAlignment.start,
    children: [
      Row(
        mainAxisAlignment: MainAxisAlignment.spaceBetween,
        children: [
          Text(
            '記事タイトル',
            style: TextStyle(
              fontSize: 18,
              fontWeight: FontWeight.bold,
            ),
          ),
          Icon(Icons.bookmark_border),
        ],
      ),
      SizedBox(height: 8),
      Text(
        '記事の概要文です。ここに簡単な説明が入ります。',
        style: TextStyle(color: Colors.grey[600]),
      ),
      SizedBox(height: 16),
      Row(
        children: [
          Icon(Icons.access_time, size: 16, color: Colors.grey),
          SizedBox(width: 4),
          Text(
            '2024年1月1日',
            style: TextStyle(color: Colors.grey, fontSize: 12),
          ),
        ],
      ),
    ],
  ),
)
よくある問題と解決方法
1. OverflowError(オーバーフロー)
子ウィジェットが親ウィジェットのサイズを超えた場合に発生します。
解決方法:
Expandedウィジェットを使用Flexibleウィジェットを使用SingleChildScrollViewでスクロール可能にする
Row(
  children: [
    Expanded(
      child: Container(
        height: 50,
        color: Colors.red,
      ),
    ),
    Expanded(
      child: Container(
        height: 50,
        color: Colors.green,
      ),
    ),
  ],
)
2. 高さや幅が想定通りにならない
解決方法:
MainAxisSize.minを使用して必要最小限のサイズに設定Intrinsicウィジェットを使用
Column(
  mainAxisSize: MainAxisSize.min,
  children: [
    Text('テキスト1'),
    Text('テキスト2'),
  ],
)
まとめ
RowとColumnは、Flutterアプリの基礎となる重要なレイアウトウィジェットです。MainAxisAlignmentとCrossAxisAlignmentを理解することで、思い通りのレイアウトを作成できるようになります。
最初は複雑に感じるかもしれませんが、実際にコードを書いて試しながら覚えていくことが一番の近道です。これらのウィジェットをマスターすれば、より複雑なレイアウトも作れるようになります。